flashcast:フリーで働くITエンジニア集団のブログ: Macで動くAIRアプリのカスタマイズしたDockアイコンを回転させる方法 〜実装編〜の続きです。今回はDockアイコンを縮小/拡大させるアニメーションです。画像の横幅を徐々に縮小していき、サイズが0になった時点で元となる画像を左右反転させ、徐々に拡大していきます。今回は縦幅は変更しません。
サンプルソースはこちら。
<?xml version="1.0" encoding="utf-8"?>
<mx:WindowedApplication
 xmlns:mx="http://www.adobe.com/2006/mxml"
 layout="horizontal"
 horizontalAlign="center"
 verticalAlign="middle"
 creationComplete="onInit()">
 <mx:Script>
  <![CDATA[
   import mx.core.BitmapAsset;
   [Embed(source="assets/AIRApp_icon128.png")]
   private var icon128:Class;

   [Embed(source="assets/AIRApp_icon16.png")]
   private var icon16:Class;

   private var isAnimation:Boolean = false;
   private var isDecrement:Boolean = false;
   private var isReverse:Boolean = false;
   private var counter:int = 0;

   private function onInit():void {
    var bitmap:BitmapData;

    if (NativeApplication.supportsDockIcon) {
     bitmap = (new icon128() as BitmapAsset).bitmapData;
    }
    else if (NativeApplication.supportsSystemTrayIcon) {
     bitmap = (new icon16() as BitmapAsset).bitmapData;
    }
    else {
     NativeApplication.nativeApplication.exit();
    }

    setIcon(bitmap);
   }

   private function setIcon(bitmap:BitmapData):void {
    NativeApplication.nativeApplication.icon.bitmaps = [bitmap];
   }

   private function onClick(event:MouseEvent):void {
    if (isAnimation) {
     this.removeEventListener(Event.ENTER_FRAME, onAnimation);
     btnAnimation.label = "Animation";
    }
    else {
     this.addEventListener(Event.ENTER_FRAME, onAnimation);
     btnAnimation.label = "Stop";
    }

    isAnimation = !isAnimation;
   }

   private function onAnimation(event:Event):void {
    var iconBitmap:BitmapData;
    var newIconBitmap:BitmapData;
    var rectangle:Rectangle;

    if (isDecrement) {
     counter--;
    }
    else {
     counter++;
    }

    if (NativeApplication.supportsDockIcon) {
     iconBitmap = new BitmapData(128, 128, true, 0x0000000);
     newIconBitmap = (new icon128() as BitmapAsset).bitmapData;
     rectangle = new Rectangle(0, 0, 128, 128);
    }
    else {
     iconBitmap = new BitmapData(16, 16, true, 0x0000000);
     newIconBitmap = (new icon16() as BitmapAsset).bitmapData;
     rectangle = new Rectangle(0, 0, 16, 16);
    }

    setIcon(scaleBitmap(iconBitmap, newIconBitmap,
     rectangle, counter, isReverse));

    if (counter == newIconBitmap.width) {
     isDecrement = true;
     isReverse = !isReverse;
    }
    else if (counter == 0) {
     isDecrement = false;
    }
   }

   private function scaleBitmap(
    iconBitmap:BitmapData, newIconBitmap:BitmapData,
    rectangle:Rectangle, counter:int, isReverse:Boolean):BitmapData {

    if (isReverse) {
     var tempBitmap:BitmapData;
     var tempRectangle:Rectangle;

     if (NativeApplication.supportsDockIcon) {
      tempBitmap = new BitmapData(128, 128, true, 0x00000000);
      tempRectangle = new Rectangle(0, 0, 128, 128)
     }
     else if (NativeApplication.supportsSystemTrayIcon) {
      tempBitmap = new BitmapData(16, 16, true, 0x00000000);
      tempRectangle = new Rectangle(0, 0, 16, 16)
     }

     var tempMatrix:Matrix = new Matrix();
     tempMatrix.scale(-1, 1);
     tempMatrix.translate(tempBitmap.width, 0);
     tempBitmap.draw(newIconBitmap, tempMatrix, null, null, tempRectangle);
     newIconBitmap = tempBitmap.clone();
    }

    var matrix:Matrix = new Matrix();
    var sx:Number = (newIconBitmap.width-counter)/newIconBitmap.width
    var sy:Number = 1;
    var tx:Number = newIconBitmap.width/2-(sx*newIconBitmap.width/2);
    var ty:Number = 0;
    matrix.scale(sx, sy);
    matrix.translate(tx, ty);
    iconBitmap.draw(newIconBitmap, matrix, null, null, rectangle);

    return iconBitmap;
   }
  ]]>
 </mx:Script>
 <mx:Button label="Animation" id="btnAnimation" click="onClick(event)"/>
</mx:WindowedApplication>
大枠は前回のサンプルソースと同様です。違うところは、縮小/拡大するサイズをenterFrameイベントでインクリメント/デクリメントするところと、画像を加工する関数、scaleBitmapの中身くらいです。enterFrameイベントハンドラのonAnimation関数の前半部分の
if (isDecrement) {
 counter--;
}
else {
 counter++;
}
では、counter変数をインクリメント/デクリメントすることで、画像の横幅を徐々に変更していきます。isDecrementフラグは、縮小/拡大の状態を表していて、falseの時に縮小、trueの時に拡大します。
onAnimationの後半部分の
if (counter == newIconBitmap.width) {
 isDecrement = true;
 isReverse = !isReverse;
}
else if (counter == 0) {
 isDecrement = false;
}
では、画像の横幅を徐々に縮小していった結果、サイズが0になった時点でもとの画像を左右反転させ、徐々に拡大していきます。画像の左右反転の状態を示しているのがisReverseフラグです。trueの時に左右反転します
scaleBitmap関数の中の以下の部分では
var matrix:Matrix = new Matrix();
var sx:Number = (newIconBitmap.width-counter)/newIconBitmap.width
var sy:Number = 1;
var tx:Number = newIconBitmap.width/2-(sx*newIconBitmap.width/2);
var ty:Number = 0;
matrix.scale(sx, sy);
matrix.translate(tx, ty);
iconBitmap.draw(newIconBitmap, matrix, null, null, rectangle);
画像を縮小/拡大する処理を実装しています。
var sx:Number = (newIconBitmap.width-counter)/newIconBitmap.width;
で、x軸方向の圧縮率を求めます。
var sy:Number = 1;
y軸方向は圧縮/拡大しませんので、圧縮率は1です。
var tx:Number = newIconBitmap.width/2-(sx*newIconBitmap.width/2);
var ty:Number = 0;
では、圧縮/拡大することによって画像の中心点が移動されますので、元の位置にもどす平行移動距離を求めています。計算式は、flashcast:フリーで働くITエンジニア集団のブログ: Macで動くAIRアプリのカスタマイズしたDockアイコンを回転させる方法 〜概要編〜の
tx=x-ax-cy
ty=y-bx-dy
より求められます。圧縮/拡大時の変換行列は
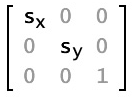
となりますので、
tx=64-sx*64-0*64=64-sx*64
となるわけです。
元となる画像を反転させている部分は、
if (isReverse) {
 var tempBitmap:BitmapData;
 var tempRectangle:Rectangle;

 if (NativeApplication.supportsDockIcon) {
  tempBitmap = new BitmapData(128, 128, true, 0x00000000);
  tempRectangle = new Rectangle(0, 0, 128, 128)
 }
 else if (NativeApplication.supportsSystemTrayIcon) {
  tempBitmap = new BitmapData(16, 16, true, 0x00000000);
  tempRectangle = new Rectangle(0, 0, 16, 16)
 }

 var tempMatrix:Matrix = new Matrix();
 tempMatrix.scale(-1, 1);
 tempMatrix.translate(tempBitmap.width, 0);
 tempBitmap.draw(newIconBitmap, tempMatrix, null, null, tempRectangle);
 newIconBitmap = tempBitmap.clone();
}
の、
tempMatrix.scale(-1, 1);
tempMatrix.translate(tempBitmap.width, 0);
です。
では、実行してみます。
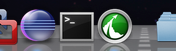

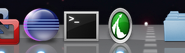


見方によっては画像中心点のy軸を基準に回転しているようにも見えますね。
■関連記事へのリンク
flashcast:フリーで働くITエンジニア集団のブログ: Macで動くAIRアプリのDockアイコンをカスタマイズする方法
flashcast:フリーで働くITエンジニア集団のブログ: Macで動くAIRアプリのカスタマイズしたDockアイコンをアニメーションさせる方法
flashcast:フリーで働くITエンジニア集団のブログ: Macで動くAIRアプリのカスタマイズしたDockアイコンを回転させる方法 〜概要編〜
flashcast:フリーで働くITエンジニア集団のブログ: Macで動くAIRアプリのカスタマイズしたDockアイコンを回転させる方法 〜実装編〜